
taken from: http://docs.mfractor.com/
If you ask Xamarin developer what can be changed in Xamarin development they will for sure mention one of the following: build time, performance, app start time, previewers, removing bin/obj from IDE, lack of Image wizard in Visual Studio for Mac, no XAML Intellisense etc.. Being honest the answers above are right. But hey, we are the developers! If Microsoft is not helping us in a way that we would like let’s try to find workarounds or invent something on our own. There are several libraries & IDE extensions that make our lives easier. For sure, one of them is MFractor — super powerful extension for Visual Studio for Mac.
So what MFractor is?
As written above, MFractor is Visual Studio for Mac extension. It was founded in 2015 in Australia. Being on a market for 3.5years it gained people’s trust & love. “Why did it do so?” — you might ask. It is because it is extending Visual Studio for Mac with features that are missing on a daily basis.
* Do you want XAML Intellisense? Done. Just install MFractor.
* Do you want to remove bin/obj folders within your IDE (btw. in my opinion it is either ridiculous that we need extensions for this or that we need to delete them from time to time. Something is definitely not working.)? Anyway, MFractor can do it.
And here comes the bomb
Do you want to have an image wizard in Visual Studio for Mac, so you can manage the resources?
Let’s make it clear: MFractor is a super powerful tool when you are developing apps under Visual Studio for Mac.
You might not believe my words, so let’s check how it works in real life.
Installation
Och, seriously? That’s very easy. In VS4Mac, simply open Extensions… under Visual Studio menu, click Gallery and search for MFractor.
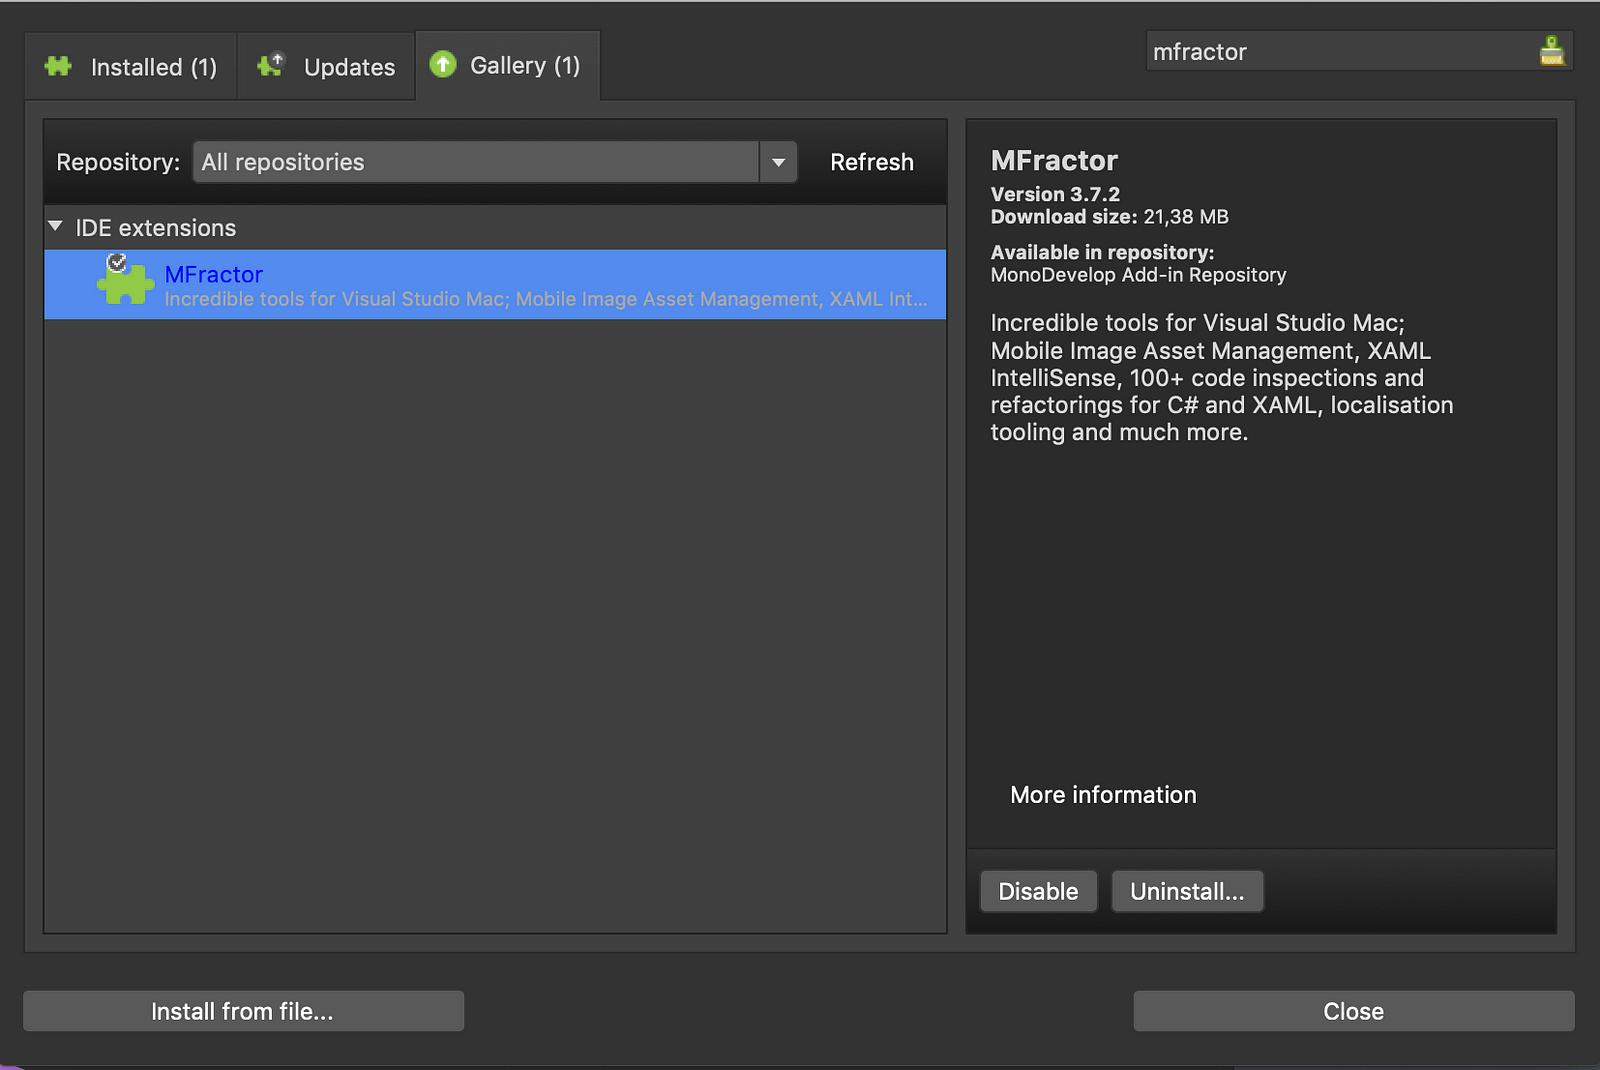
Voila. One thing to notice. You will have install instead of Disable/ Uninstall… Simply install it and follow the steps required — pop-up will open. As you are probably a developer let’s not waste the time of something as easy as installation. Let’s move to the interesting part.
Image manager
Let’s start with this totally awesome feature. It came out just a few days ago so it is still pretty fresh.
Let’s assume. You want to manage image assets within your project, but you really hate doing it manually.
Check what MFractor is capable of:
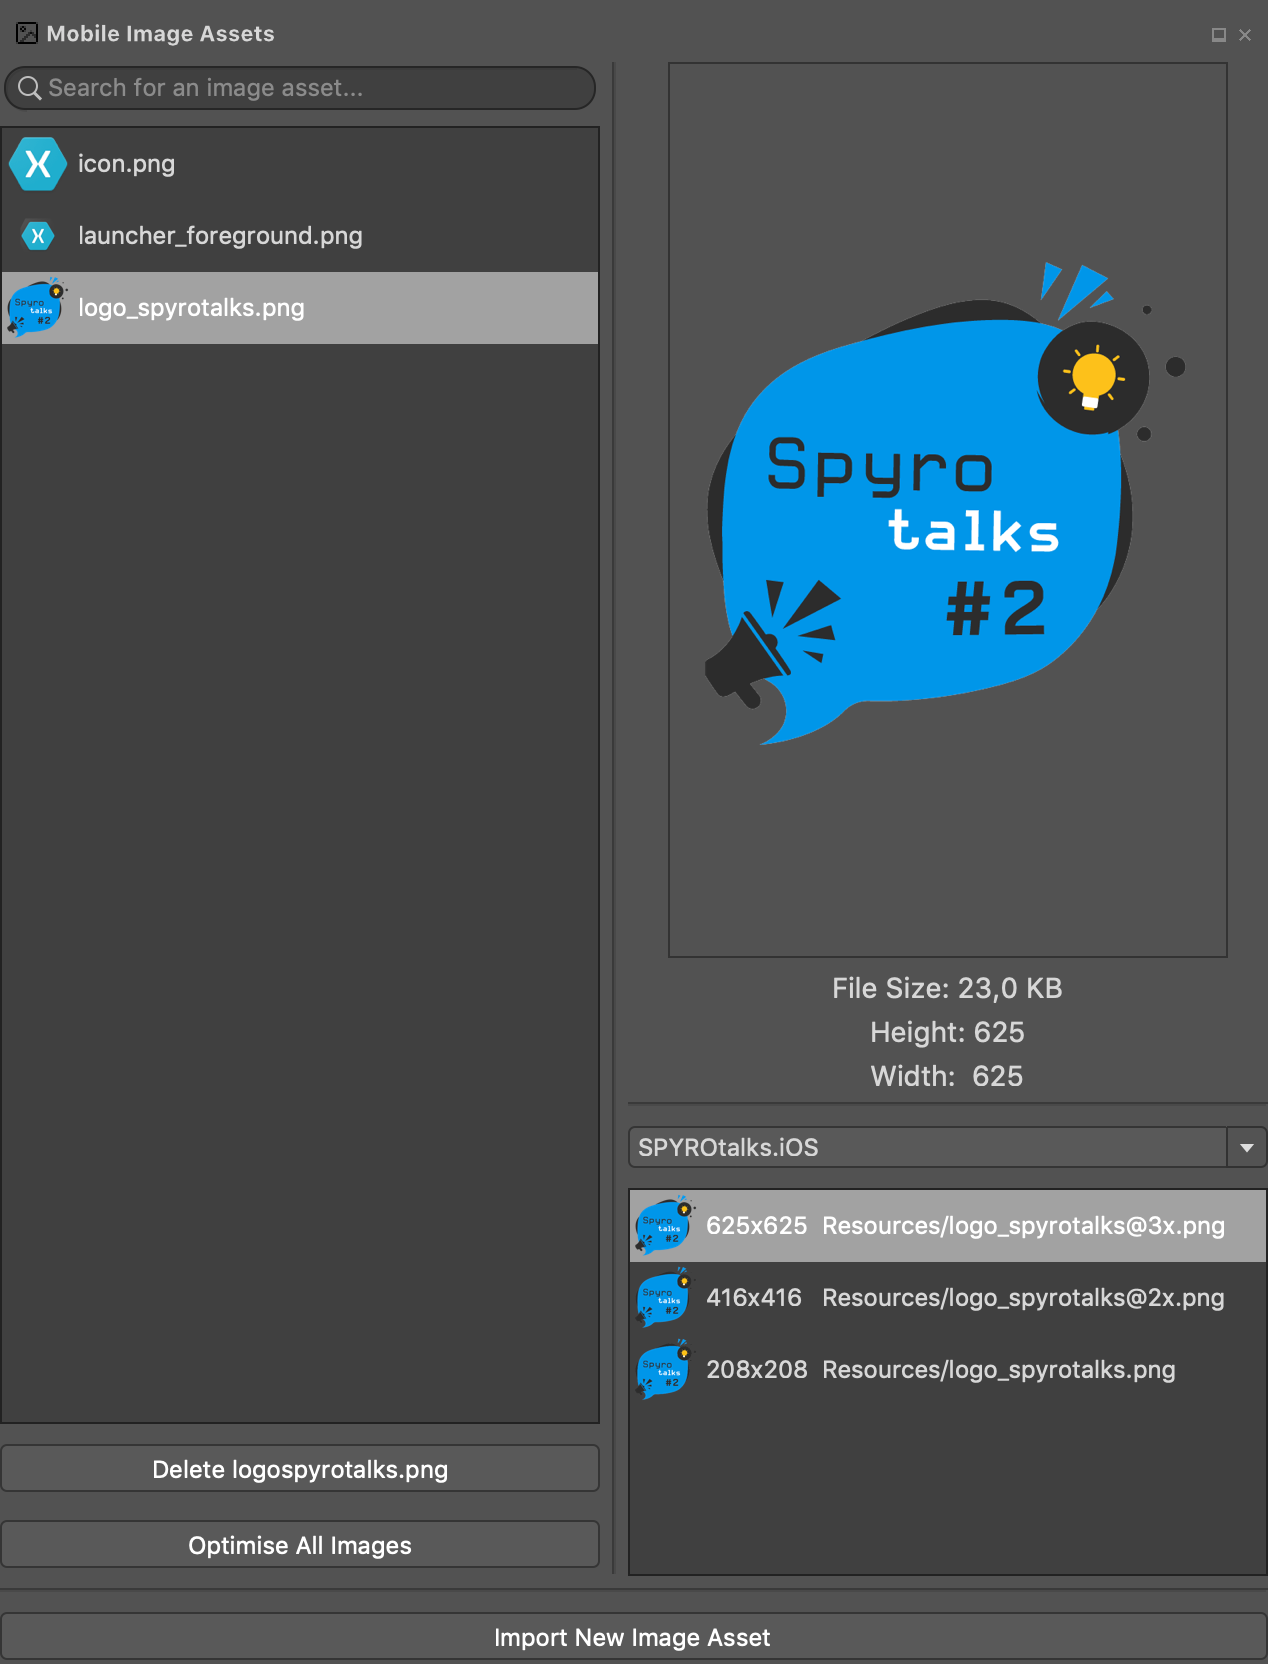
As you can see you have a list of all icons included in the project with thumbnails. When you click on the item you can see the image in bigger size. Also, you may notice that there is a dropdown where you can select your project and check which icons are included in the project (SPYROtalks is the name of my project).
What can you do within the image manager?
Import New Image Asset
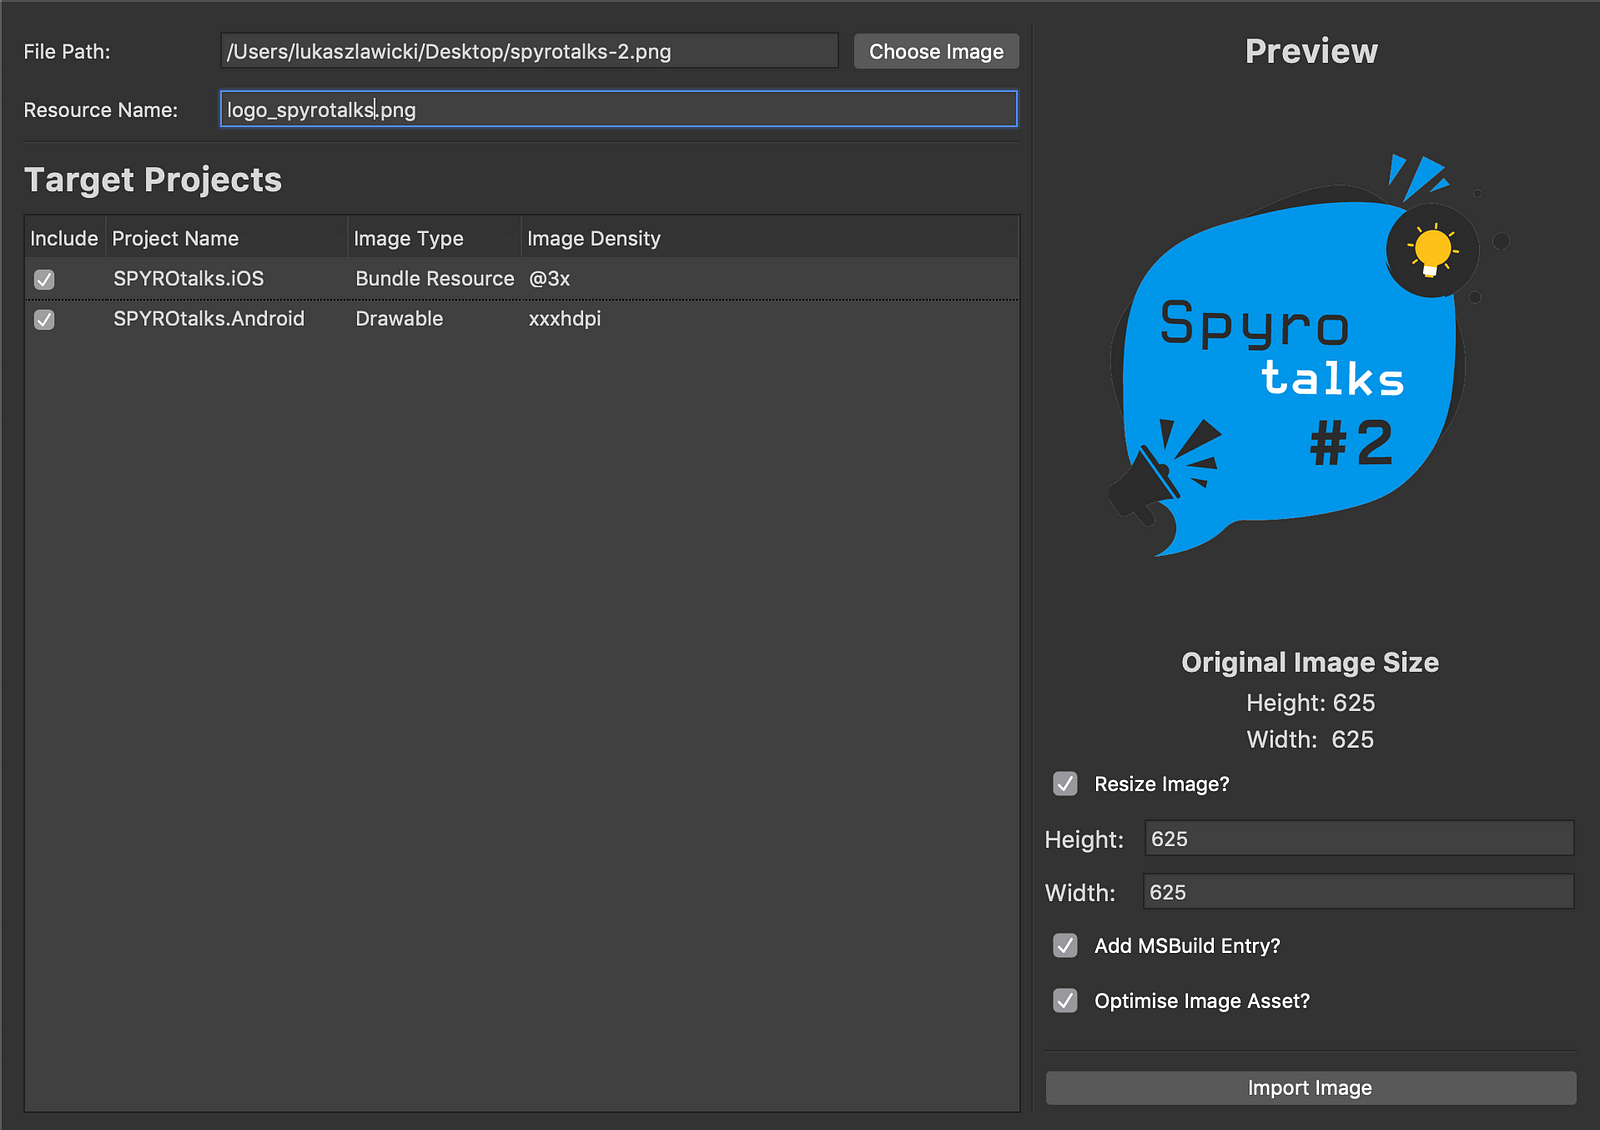
Adding the asset is really easy.
- You simply select the image from your computer. MFractor should detect automatically what is Image Density. If you don’t agree you can change it.
- After you do it, you need to provide the Resource name. Fair enough, isn’t it?
- Now, you need to decide to which projects you want to add the asset.
Basically, that’s all you must provide. If you want, you can resize an image or optimise it. While writing this article I decided to check how good is image optimisation. In order to check it, I took 10photos and optimised all of them. Here are the results.

As you can see in the table above, in general, the results were pretty good. An average of 54% makes it a good result. What is interesting though is the fact that one image was bigger after optimisation than other. Why? I don’t know.
Delete image
In Image manager, you can also delete assets. What is great & time-saving is the fact that it will remove all asset densities at once. No need to delete it 6 (or even more) times. Truly time saver.
Optimise all images
In case you forgot to optimise your asset when adding it, you can later optimise all images. Good to know.
If you want to learn more about image asset go ahead and read Matthew’s article which is available on MFractor blog.
XAML IntelliSense
If you are not that experienced Xamarin.Forms developer, you might find developing XAML UI’s a nightmare. On the other hand, if you are even experienced Xamarin.Forms developer you might get pretty frustrated when using XAML. Firstly, because of the lack of previewer (there is one, but let’s be honest: it does not work for complex views), you are creating UI’s almost blindfolded. You have to use imagination. Won’t it be better if we have a built-in LiveXAML or something like that? Unfortunately, it doesn’t look like Microsoft gonna provide us with something working. Pitty.
Secondly, the lack of XAML IntelliSense. It will be nice to have it, so when you create bindings to your ViewModel you can select the property from the dropdown instead of typing it on your own. Who has never made a typo in the name of the property, compiled the code and was wondering why the heck it is not working?
MFractor for the rescue
Another great feature of MFractor is XAML IntelliSense. It can suggest you the names of the properties in ViewModel, so you can bind to them. Also, it can suggest you the names of the images you have in resources and many more. Don’t you believe me? Go ahead and check these gifs.
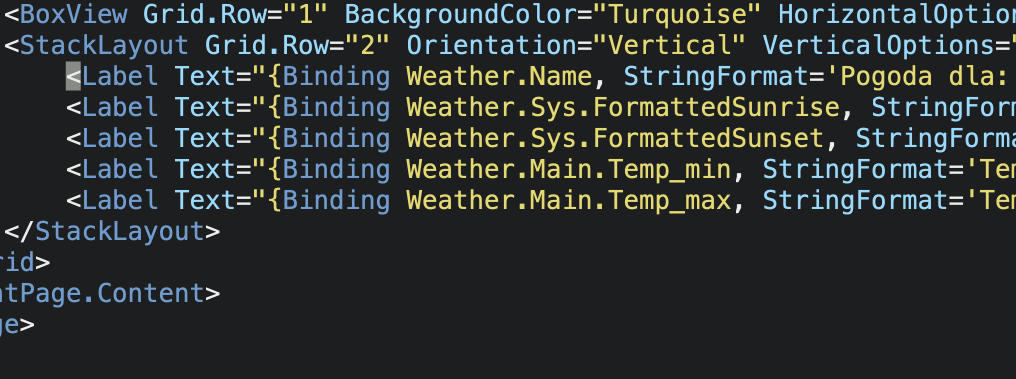
Just to explain: in my project, I have three icons: Icon.png, Launcher_Foreground.png & logo_spyrotalks.png. As you can see MFractor is giving me an option to choose one. Nice! Let’s move to bindings. As you may suspect, MFractor is suggesting you the properties in a similar way that it is suggesting the images.

As you can see in my ViewModel I have 5bindable properties. What I really like is the fact that with MFractor is almost not possible to make a typo in the name of the property.
Generate ViewModel property
Are you a person that prefers to write Views first? If yes, I have good news for you: with MFractor you can generate ViewModel properties from your View. When creating the View you may find that you’ve forgotten to create one property or another. With MFractor you can create them without changing the file. Nice, huh?
Go to a usage of ViewModel property
From time to time you might want to check where the property is being used. Unfortunately, when you look for references in Visual Studio it won’t find the ones you have in XAML. Of course, as you may assume MFractor can find those references if you to.

MVVM Wizard
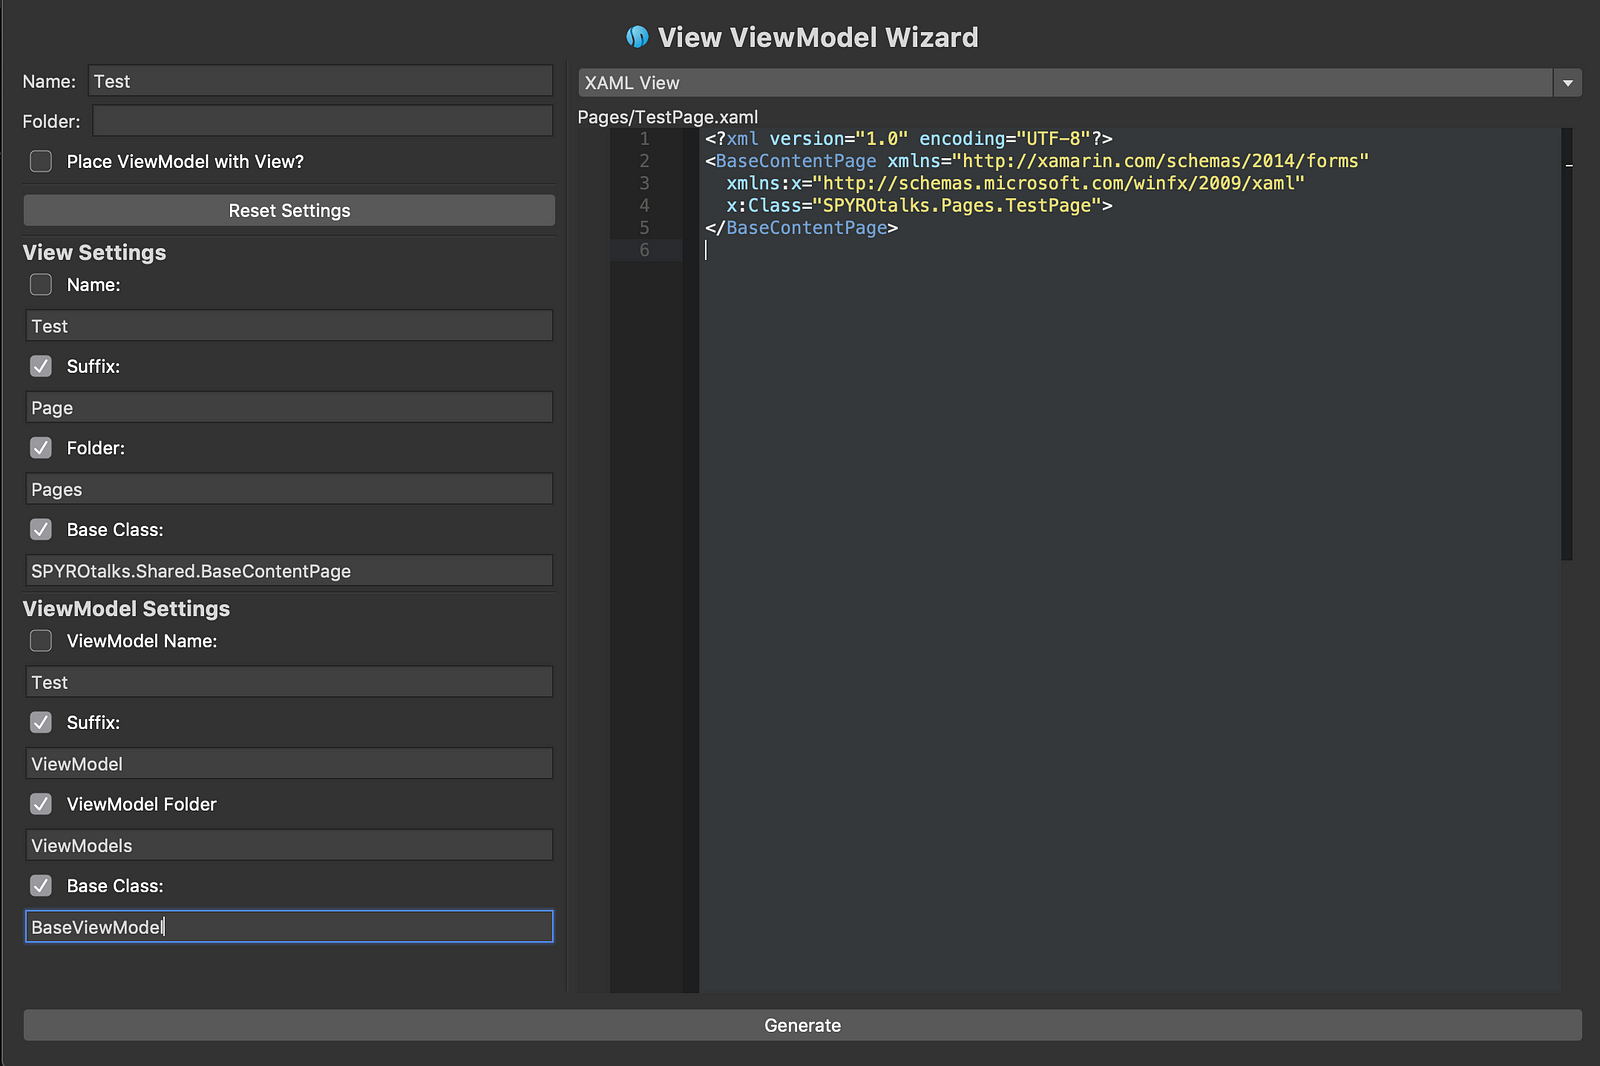
This is something that wasn’t stated at the beginning of this blog as it was not released yet. According to the marketing announcement in version 3.7.3 the MVVM Wizard will be available.
According to the tweet by Matthew Robbins (the founder of MFractor) you will be able to create both View & ViewModels withing (almost) one click.
The MVVM Wizard is now out in @mfractor v3.7.3 for @VisualStudioMac!
Use the wizard to quickly create new XAML Views and ViewModels; it’s an easy way to generate the code for new areas of your app, saving you lots of clicks and keystrokes!
Learn more: https://t.co/uQdvq4YHd6 pic.twitter.com/AYz3563NEK
— Matthew Robbins (@matthewrdev) January 28, 2019
What is nice about this feature is the fact that it gives you control where to place the files & what are the base classes. It sounds promising, but I already have questions: will it support Xamarin.Native also? If we add XAML with BaseContentPage will it work out of the box? Let’s check it out. I will update this article as soon as the version 3.7.3 is released.
UPDATE: just installed version 3.7.3 and there is MVVM Manager. It looks like the one in the picture above. There are three ways to access it: from MFractor menu, from Solution options & with a Cmd + Shift +M shortcut. Right now, the manager works for Xamarin.Forms projects only.
If you want ViewModel to derive from BaseClass you might need to write the class with a namespace before. Otherwise, you will need to import the class when the VM is created.
UPDATE 31.01: What you will read below is no longer valid (XAML issue). I have raised the issue above & after 33h it was solved. Version 3.7.5 should have it fixed. As I have written in my tweet – this is how solving bugs should be done! End of update 😉
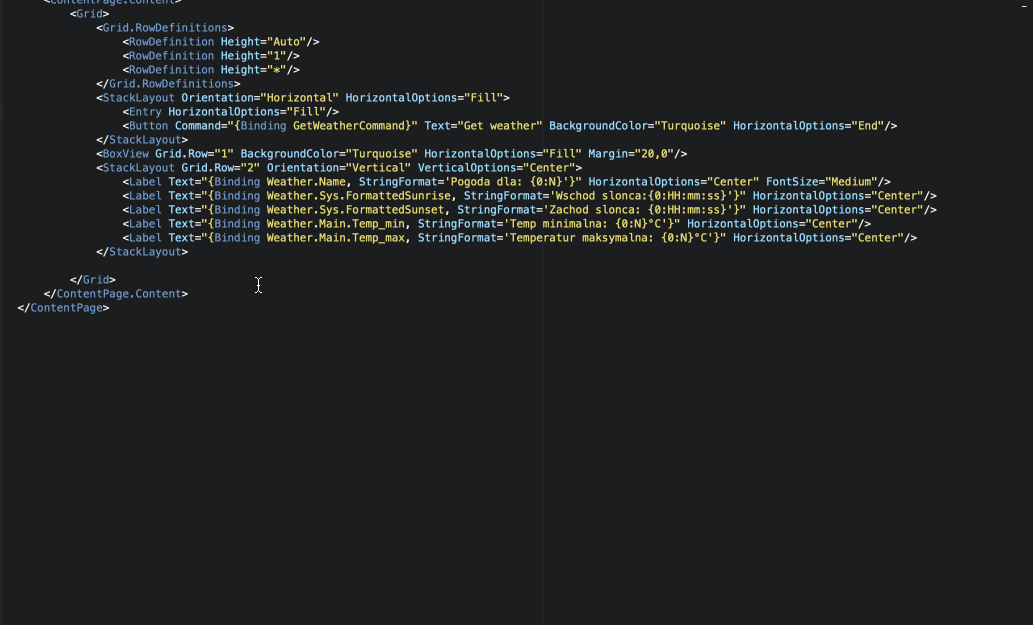
The problem is with XAML file. As I assumed, deriving from eg. BaseContentPage won’t be that easy. When you want the View to derive from you BaseContentPage you need to feed the MVVM Manager with the following:
Is the code visible the one that we need? Not fully. It’s similar to the one that we want but not exactly the same. We need code like this:

It is not a big change but we need to handle it on our own. I can fully understand, that this is not an easy task to achieve and we can’t blame MFractor for not handling it properly. I am just writing it as I want to be completely honest with you! I believe it’s still better to slightly adjust the created files then to create them from scratch.
If you are interested, on the MFractor blog you can read more about MVVM Manager.
bin/obj
As I have stated at the beginning of this article, I am not sure what to think of bin/obj folders. Firstly, you have to delete the pretty often when developing a Xamarin app. I think it’s an issue. Why do we have to do it? If it is a known issue (and based on my conversations with my colleagues I believe it is), shouldn’t we be provided with an option to delete those folders within our IDE? Doing it manually takes so long. Sure, you can have a script to do it, but is it something we need to implement on our own?
Fortunately, MFractor has a feature that can delete those folders for you. How? Pretty simple. Check it out:

In here you have options: either delete Output folders (deletes bin/obj & NuGet packages) or you can only Clear Nuget Packages.
Conclusion
So what are the cons of using MFractor? Some might say that MFractor Professional price ($200 AUD per year) can be the issue. But hey! Is it that much for a lifetime license? I don’t think so. Especially when you take into consideration the number of hours being wasted because of eg. typo in your XAML or adding image assets.