Welcome to the second lesson of the tutorial “how to make your life easier with Azure DevOps!”. This time, we will talk about setting up your project and we will end up with a dummy pipeline. If you’ve never used Azure DevOps then this post is for you. Otherwise, you need to wait can wait for the next one.
Requirements
For this lesson we have only one requirement: you need to have your Xamarin app in the repository. I’ve used Github for this purpose, but you can also use Azure DevOps, Bitbucket, Gitlab.
If you have your project already on Azure DevOps, you can jump to the 3rd point.
Steps
1. Create a new project
After you log in to your Azure DevOps, in the top right corner you should see “Create project” button. Don’t think a lot a – click it.
This form should become visible
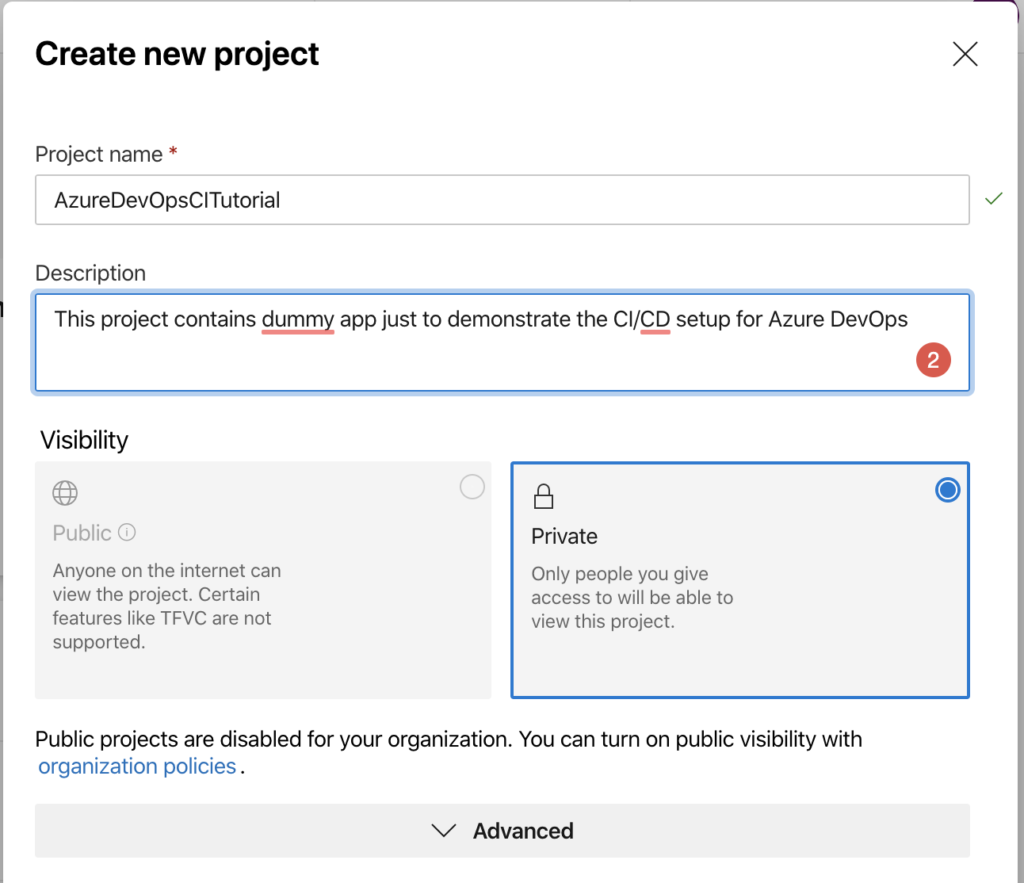
Fill Project name & Description (optional) and click on create button. In the advanced option, you can specify the following

When you use something different than git you can specify it here. Changing the second option would reflect your board and task management process. If you are going to use this functionality of Azure DevOps, feel free to change it. However, I won’t use it, so I am not changing anything and stick to the default Agile.
2. Your project should be created.
You should see a lady sitting with her dog in front of her computer and a nice left-hand panel.
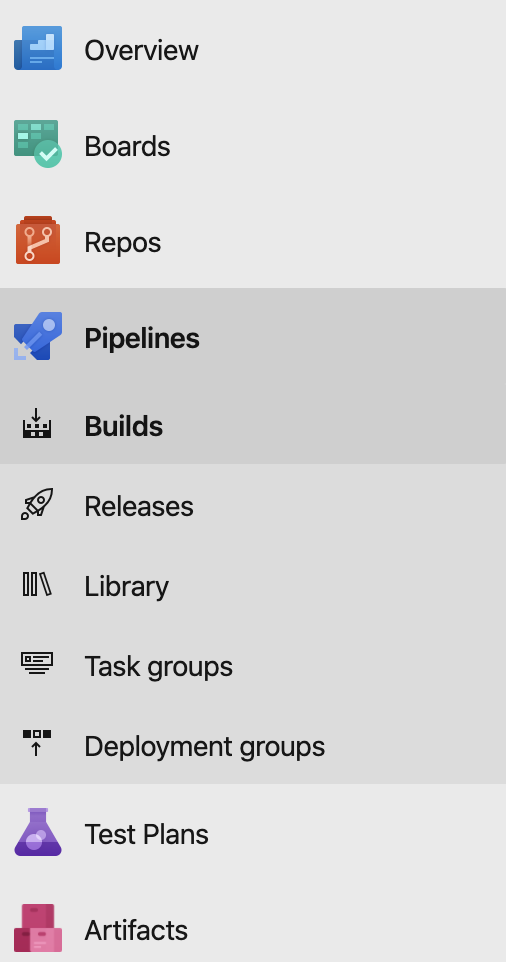
3. Click on ‘Pipelines’ and then click on ‘Builds‘
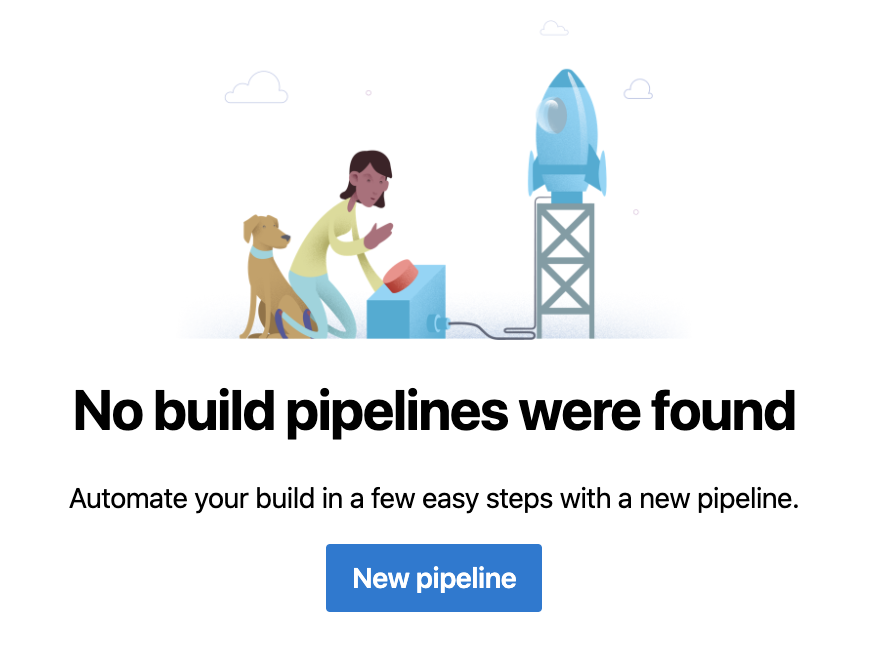
One more time, you should see the same lady as in the first with her puppy.
4. Click on ‘New pipeline’ button
5. Where is your repo?
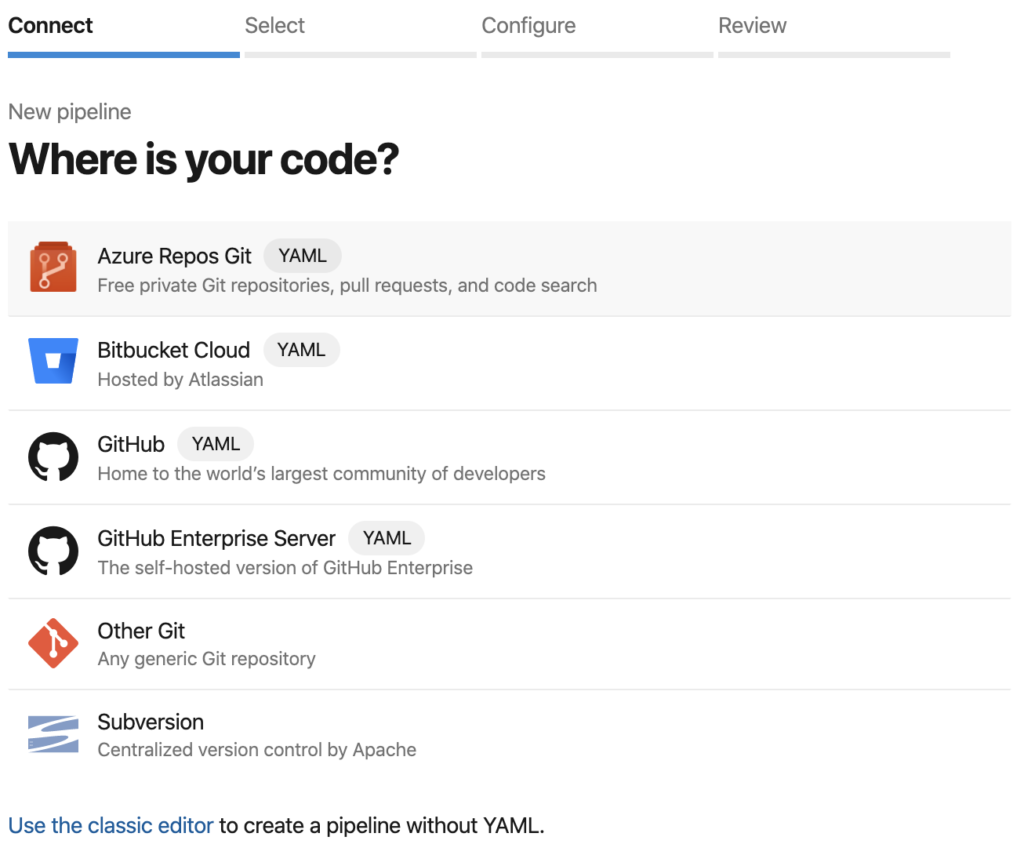
Mine is on GitHub, where is yours?
6. From the list, choose which repository you would like to connect.
7. Time to configure the pipeline.
Let’s do it! In this step, you should be prompted with this view
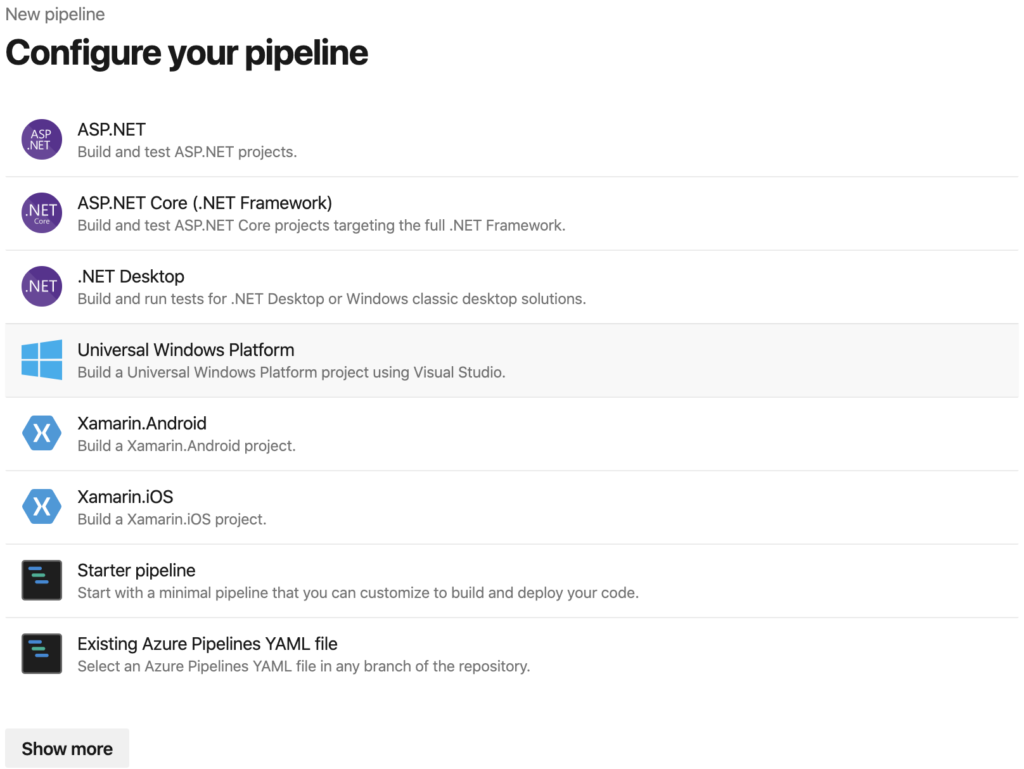
For the purpose of our small tutorial, please select “Starter pipeline”. You can select a different one, however, as we gonna use cake I suggest you use minimal one.
8. An empty pipeline was generated for you.
It should look like this.
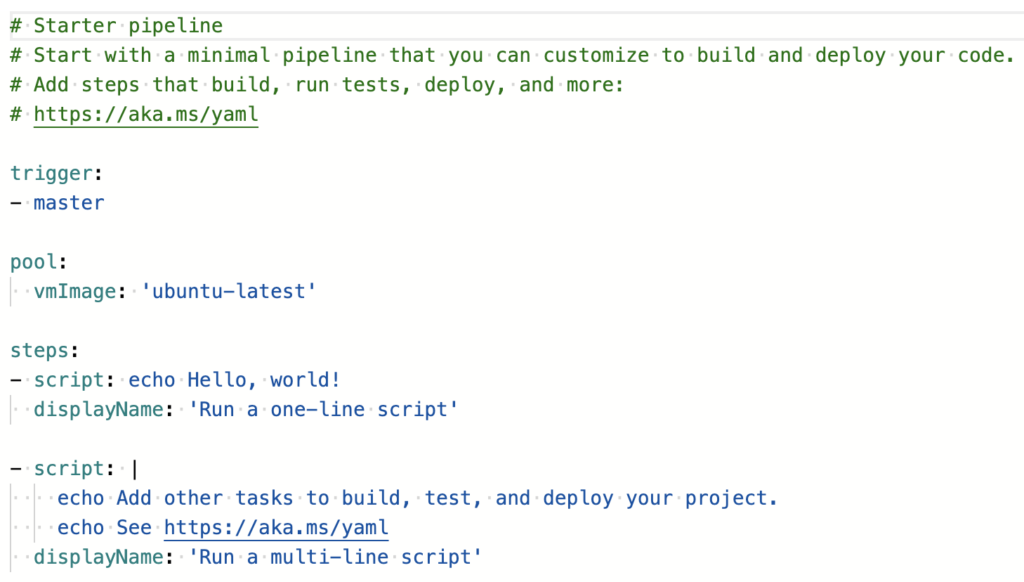
Although it’s good how it is, you need to change one thing. Instead of using 'ubuntu-latest', you should use 'macos-latest'. After all, we are building Xamarin application, so in order to build iOS we need Mac. Don’t we?
9. Having that done, click on ‘Save and Run’ button.
You will be prompted with the following dialog
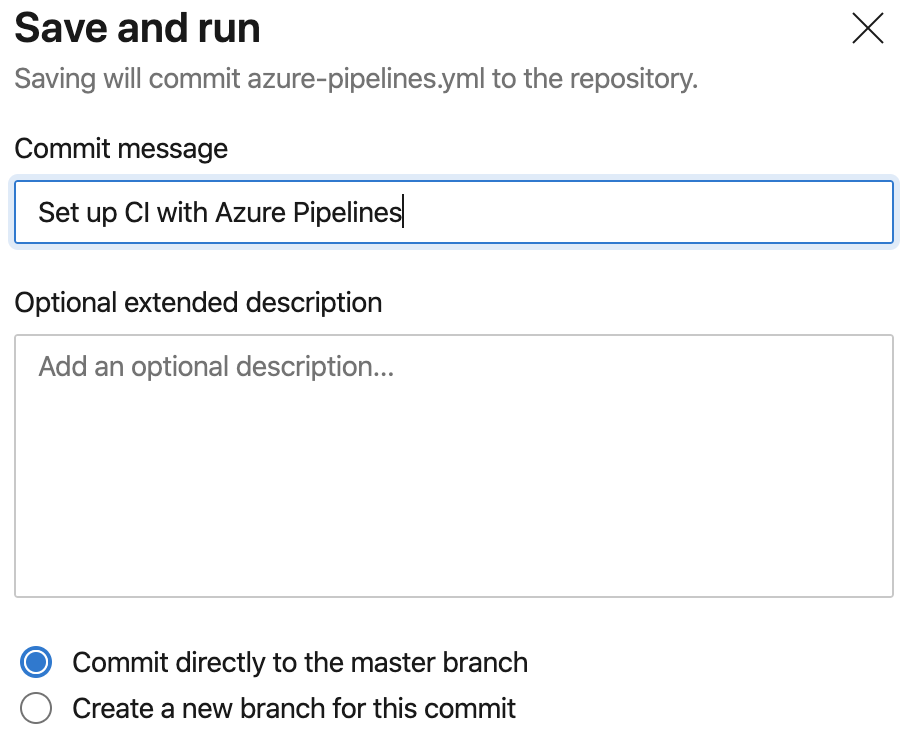
Let me quickly explain what’s happening here. In order to build your app with Azure Pipelines, you need to have azure-pipelines.yaml in your repository.
Depending on your repository settings, you might not be able to push directly to master. Microsoft know that and they give you the opportunity to automatically create a new branch on your behalf. Later, you can create a PR with this change and get it to master. I you are allowed to push to master directly, I’d suggest change the settings of your repo and go with Create a new branch for this commit. It’s better to have control what ends up on master
10. Save and run (once again)
After you press it magic will happen. You will see 7 steps of the pipeline. One working and others waiting. After a moment you should see all of them marked as done.
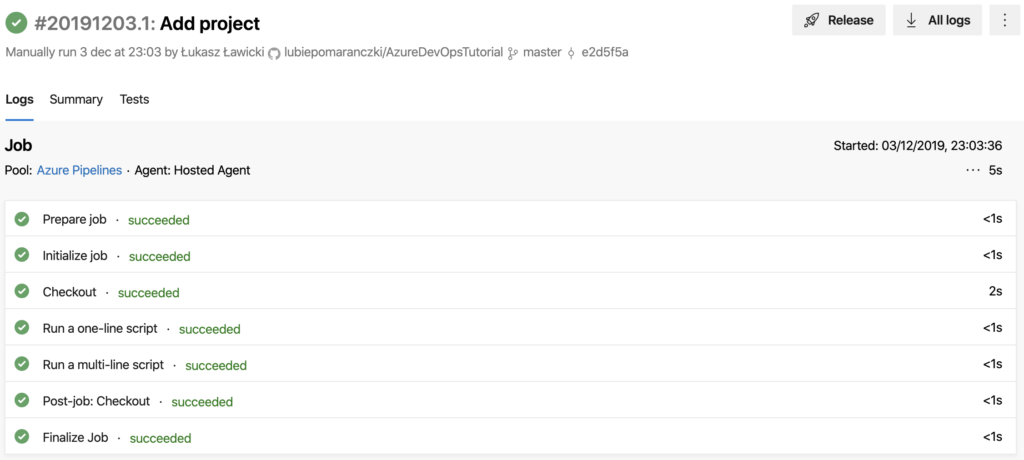
Now you have your project set up. Whenever you push to master this dummy build will run.
Wrapping up
By now you should probably have Azure DevOps ready to build your solution. We didn’t use any of your c# code, we didn’t use ‘cake’ but trust me when I see we will use a lot of it in the next lesson.
For the time being, let’s end up here as the next “lesson” will be more complicated. Let’s rest!
[mc4wp_form id=”497″]